Saturday, June 30, 2012

Layla Hologram Effect

A few weeks back I picked up four polishes from Layla's spring holographic nail polish collection release.  These are my first linear holographic polishes and I was excited to give them a shot.  Yes, over a year of blogging and being in the nail polish community and these were my first holographics.  Let's just say that I needed to see in person what all the fuss is about.  No picture ever does these polishes justice!

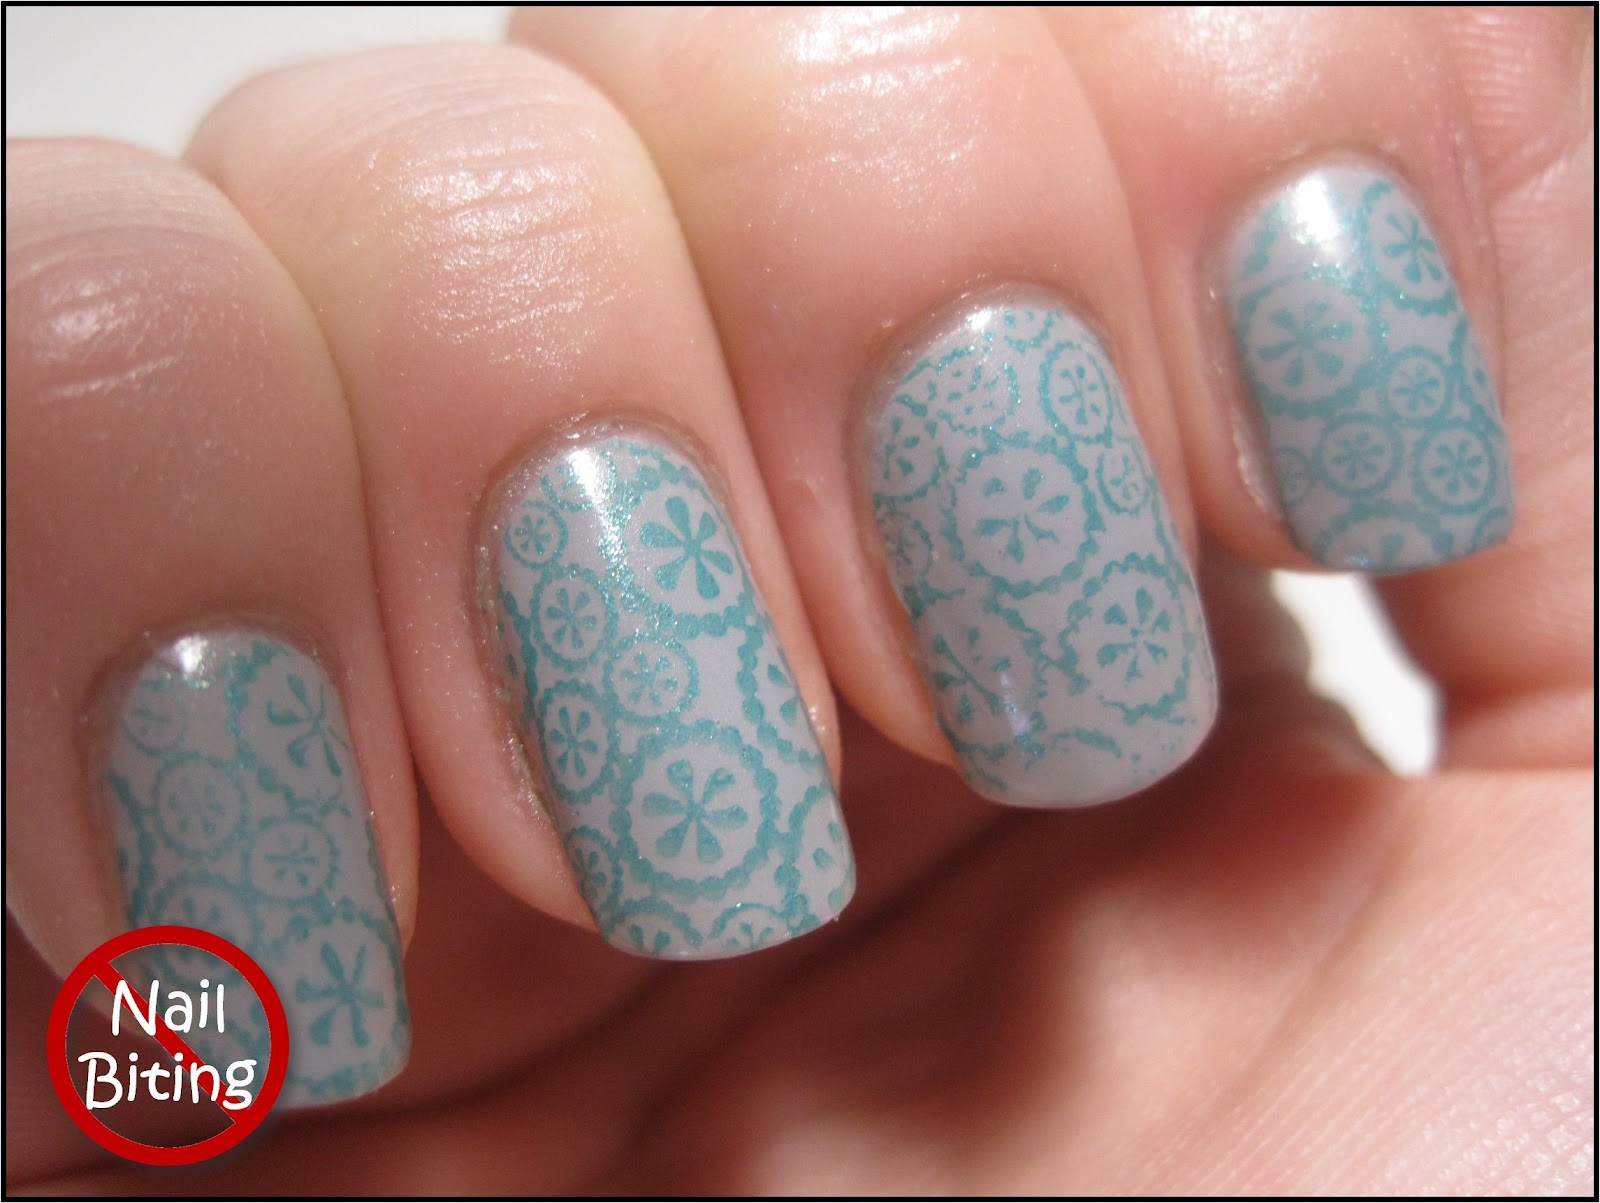
All of these polishes use a coat of Seche Vite dry fast top coat on top of a base coat to create a smooth surface for polish adhesion.  I did not wrap my tips nor did I apply top coat to these swatches.


01 Mercury Twilight


Layla 01 Mercury Twilight is a lovely silver holographic nail polish.  Beneath Mercury Twilight I used one coat of  Sally Hansen Continuous Treatment base & top coat (one polish).  While I think it's rather plain (I enjoy my color!), I do think its simplicity adds to its charm.  This polish was pretty easy to apply with minimal streaks, pictured here is three coats. 


03 Retro Pink


Layla 03 Retro Pink is a lovely pink holographic polish.  Underneath Seche Vite I used OPI Nail Envy Original for my base.  I used three coats of Retro Pink to arrive at this density.  The color wasn't as delicate as some of the others appeared to be, instead it was a nice bright pink.  The one item I did not love about this formula was how fast it began to chip.  Within twenty four hours of wear the polish had chipped from all my nails and was in poor condition.  Other than wear, I was very pleased with this polish.


04 Ultra Violet


Layla 04 Ultra Violet is by far my favorite polish from this collection.  Underneath Seche Vite I used Sally Hansen Continuous Treatment base & top coat (one polish).  Ultra Violet, while noticeably purple, was more of a lavender or light purple than a stand-out color.  Formula-wise I could have gotten away with two coats of polish but decided to spring for a third just because.  I was really impressed with how nicely this color wore compared to Retro Pink and (spoiler alert!) Mermaid Spell.  I wore this polish for three days  before I had any sort of tip wear and that's pretty amazing considering my tips weren't wrapped and this is without top coat.


06 Mermaid Spell


Layla 06 Mermaid Spell is my least favorite from this series.  It was an absolute pain to apply.  This was also the first holographic polish I tried so there may have been some human error in the application.  I don't believe that I used anything beneath Seche Vite (which may have been my application problem?).  I used five coats of Mermaid Spell to get to this point...and if you click on the picture to make it bigger you'll see there are still some streaks in the polish, especially on my ring finger.  The streaks in the polish were one thing, the terrible chipping that occurred with this polish was another.  Within a few hours this polish had basically all chipped off.  Talk about a bummer!  


Overall I'm really happy I bought these polishes.  They were worth every penny that I paid for them (except maybe Mermaid Spell).  I did hear that Layla is coming out with eight more holographic polishes to add to this collection - awesome!  I'm looking forward to picking up a couple of those as well.  

Thursday, June 28, 2012

MDHN Blogeversary Entry

Serendipitously Create is celebrating the one year anniversary of her blog: Mommy Does Her Nails.  To celebrate she is holding a nail art contest!  The rules are simple: visit the website colourlovers.com, pick out a design, and do a manicure base off of that.  This was the design I chose:


Dots, dots, and more dots!  


To replicate this design on my nails I painted everything with a base of Sally Hansen Xtreme Wear White On.  I used Sally Hansen Lickety-Split Lime as the color for all the green dots.  For the accent dot colors I used China Glaze First Mate, Zoya Dana, and Sally Hansen Snappy Sorbet.  This was the final result:


It has a sort of retro-vibe to the design but I love the pops of color from First Mate, Dana, and Snappy Sorbet.  This isn't a wear to work type manicure but is still nice for the weekend.  

Tuesday, June 26, 2012

A Sort of Scale Design

I'm back in one of those "not feeling like painting much" moods, which is not exactly where I'd like to be right now!  It could have something to do with the amount of overtime I'm working, the lack of a maid, and the lack of a personal chef...

Today's stamping manicure was brought on by this funk - my nails were naked.  The horror! The shame!  So I threw on a quick coat of China Glaze White Cap.  Now if you've ever used White Cap you know that's it terribly sheer (and if you haven't used White Cap, well, now you know!) and one coat doesn't really cover much.  From previous experience I prefer a total of four coats of White Cap to be satisfied with the opacity and then it's still pretty sheer.  I threw White Cap in my purse and went to work ... where I added my second coat of White Coat during lunch.  A third coat occurred sometime before dinner, and the four came while my boyfriend and I were playing a cutthroat friendly game of Dominion.

After I solidly beat him at Dominion, I pulled out the Red Angel stamping plates that I accidentally bought.* The shimmer of White Cap reminded me a bit of fish scales so using Sally Hansen Insta-Dri Brisk Blue I stamped the scale pattern from Red Angel plate RA-111. VoilĂ ! A finished manicure!


These photos are of the same hand, I just flipped one and forgot to flip the other!

What do you think?


*How does one accidentally buy stamping plates you ask?  Simply put them in your Amazon.com cart and forget to take them out when you buy something else!

Sunday, June 24, 2012

Week 24: Flag Manicure

Welcome to Week 24 of the 52 Week Challenge: Flag Manicure.  This week was supposed to coordinate nicely with Flag Day (June 14th) but I'm a bit behind in my year-long challenge.  I used this post from heart NAT as inspiration for my nails.


I used Zoya America for my middle, ring, and pinky fingers, and China Glaze First Mate for my thumb and pointer.  I've said it before but I feel I need to say it again: the formula on America is fabulous.  One coat perfection.  This was my first time using First Mate; the first coat was streaky but with the application of a second coat everything evened out and was covered nicely.  For the stars and stripes I used Bundle Monster plate BM20 and Sally Hansen Xtreme Wear White On.  I've filed off some of my nail length in the last week, but the Bundle Monster plates are still too tiny to fit most of my nails (middle and thumb especially). Oh well.  I do really like how this ended up turning out!  

Be sure to check out what others have done for this challenge by visiting their blogs:
LizMarie at I'm Simply Complex • Jenna at I'm Still Thinking... • Caitlin at Addicted 2 Nails • Sarah at PrncessSarah02 • Charlotte at Charlotte's Nails :) • Shally at Polished & Not Quite Put Together • Rachel-Karina at Polished Criminails • Liz at Nothing But Nail Polish • Fun With My Nail Polish • Operation: Nail It! • Lauriestrodes Fun With Nails • Square Polish • Only Always Soccermom  • Hurr Did, Nails Did • Olivia Writes • The Dragon Lady • Kaki at Glitter Obsession • Isa at IsaBella's World • Gypsy at Gypsy's Glitter • Jackie at MeMa's Mani's  • Lissa at Lissa's Nail Blog  •  Marie at Polish, Polish, Polish...  • ChiChi at... •  Esra at Oje Sihirbazi (Wizard of Polish) •  Nails, Actually • Treselaine at Tres Chic Nails • Carol at Nails by Carol

Thursday, June 21, 2012

Butterflies

Another quick stamping manicure to keep my nails from being naked.


I used two coats of Essie Bangle Jangle as my base then stamped butterflies on top using Zoya Rory and plate DRK-A.  The final effect was very subtle was a distance, and actually rather subtle up close.  I could tell that my nails had a bit of a shimmer but couldn't really make out the shapes.  I'd rate this manicure as a solid "meh," but it was effective at keeping my nails from being naked so it gets points there.  I took it off when I got home from work.

How long would you keep on a "meh" manicure?

Tuesday, June 19, 2012

Neon Half Moons

I love the colors from the China Glaze Summer 2012 Neons Collection.  They're bright and cheerful, the perfect pick me up summer color.  It's these bright colors that make me miss the nice weather when winter finally hits.  Because these colors are just so awesome, I've been using them in several of my manicures lately (here).


To create this look I used China Glaze Orange You Hot? as the base (the moon part) and China Glaze Hang-Ten Toes.  Love!

Did you pick up any of the China Glaze neons this summer?  What types of colors are you loving at the moment?

Sunday, June 17, 2012

Week 23: Ombre Manicure

Welcome to Week 23 of the 52 Week Challenge!  This time the goal was to create an ombre manicure.  I went with a pink theme and tried to pick my best matching pinks.  I got a little carried away, because I then decided to pick my best matching Zoya pinks.


From pinky to thumb I have: Zoya Portia, Zoya Cassi, Sally Hansen I Pink I Can (I was so close to all Zoya!), Zoya Dana, and finally Zoya Areej.

Be sure to check out what others have done for this challenge by visiting their blogs:
LizMarie at I'm Simply Complex • Jenna at I'm Still Thinking... • Caitlin at Addicted 2 Nails • Sarah at PrncessSarah02 • Charlotte at Charlotte's Nails :) • Shally at Polished & Not Quite Put Together • Rachel-Karina at Polished Criminails • Liz at Nothing But Nail Polish • Fun With My Nail Polish • Operation: Nail It! • Lauriestrodes Fun With Nails • Square Polish • Only Always Soccermom  • Hurr Did, Nails Did • Olivia Writes • The Dragon Lady • Kaki at Glitter Obsession • Isa at IsaBella's World • Gypsy at Gypsy's Glitter • Jackie at MeMa's Mani's  • Lissa at Lissa's Nail Blog  •  Marie at Polish, Polish, Polish...  • ChiChi at... •  Esra at Oje Sihirbazi (Wizard of Polish) •  Nails, Actually • Treselaine at Tres Chic Nails • Carol at Nails by Carol

Friday, June 15, 2012

Circles

I was looking for a quick manicure here, something to keep my nails from going naked at work.  I selected two polishes that I hadn't worn before and used my new stamping plate to create the design below.


For my base I used two coats of China Glaze Pelican Grey.  I was very surprised by this polish.  I thought it was a plain, dull grey - but it's not!  It has a lovely shimmer going on.  I then stamped the circle image from plate DRK-A using Zoya Zuza.  I love Zuza...I don't love how it stained my nails when I wore it as a solid color.  It's been relegated to just a stamping or accent polish now.

Tuesday, June 12, 2012

The Hunt: Nude Polish

There has been a lot of inner turmoil in my life lately and I've found myself drawn to just wearing nude nail polish.  This prompted me to assemble all my nude polishes together in order to determine which was the perfect one for me.  I think these are all good wear to work polishes, great for the days when you don't want your nail polish to distract from the message you're trying to deliver.

While I have my own favorites I'm curious as to what you think.  Which nude polish do you think is right for me?


Sally Hansen Complete Salon Manicure Choco-Latte


Sally Hansen Complete Salon Manicure Choco-Latte is a pale beige with peach/pink tones.  I have an "older" bottle of Choco-Latte and a significant portion of the polish is gone from it.  At the level where the polish currently resides a lot of bright pink pigment is separating out and needs a lot of shaking to get it to mix properly.  It's my least favorite of the bunch but I thought I'd include it in this collection because I have worn it a lot.  

OPI Did You 'Ear About Van Gogh?


OPI Did You 'Ear About Van Gogh? is from the OPI Spring 2011 Holland Collection and is a pale tan nude with yellow/grey undertones.  I'm not really a fan of how this color looks on me.  I used it as a base for a manicure on my mom and I think it looks much better with her slightly darker skin tone.  

Zoya Kennedy


Zoya Kennedy is from the Zoya 2011 Winter Feel Collection.  It's a pale, beige cream that leans pink.  I think this color looks very soft on me and I'm a fan of it.  

Zoya Pasha


Zoya Pasha is described as a soft, pale taupe beige nude with silver frost and a hint of microglitter. This color is from the Zoya Suede collection from way back when (circa 2004 maybe?).  I loved the frost, I thought it lent the perfect spark this polish needed from being just a boring brown.


Zoya Shay


Zoya Shay is from the Zoya 2011 Touch collection and is described as a light peach nude with red/orange undertones.  Similar to Zoya Pasha, Shay has  a bit of a frosty-look to it.  I used two coats of polish to achieve this look, but I'm guessing three coats would eliminate that patchiness I see on a couple of my nails.


Now I need your help.  Which nude pictured above do you think looks best on me?  What nudes am I missing that you think I should have?  

Sunday, June 10, 2012

Week 22: Splatter Manicure

Welcome to Week 22 of the 52 Week Challenge!  This week's challenge was to create a splatter manicure and I certainly found this to be quite a test of planning and patience.  Before this challenge I had never created a splatter.  I knew the trial involved a straw, multiple polishes, and a lot of clean up but I didn't know the particulars.

When I first sat down to do this design I had a regular drinking straw.  In this case it was about a centimeter in diameter.  I cut down the straw to the length of my index finger (I can't remember where I heard this tip at) before using it.  I made a small puddle of polish on a piece of parchment paper, dipped my straw in, then blew a puff of air through the straw while it was positioned over my nail.  ...and nothing happened.  So I tried again. And again and again.  Nothing.

I determined this was a mechanical problem based on the diameter of the straw.  I wasn't able to produce enough force with my puffs of air for the diameter straw I was using.  I picked up a 3 mm coffee stirrer to try instead.  This straw I did not reduce in size.  I followed the same technique as before: create a puddle of polish on a piece of parchment paper, dip in straw, then blow polish onto the nail.  This time it worked!  And lo I created the design pictured below.


I used two coats of China Glaze Orange You Hot? as my base then used China Glaze I'm With The Lifeguard, China Glaze Splish Splash, and China Glaze Hang-Ten Toes.  I love how bright all these polishes are!  I don't know if I'll be doing another splatter manicure any time soon; this was a lot of work for a manicure that doesn't look like it took a lot of effort.  What do you think of splatter manicures?

Be sure to check out what others have done for this challenge by visiting their blogs:
LizMarie at I'm Simply Complex • Jenna at I'm Still Thinking... • Caitlin at Addicted 2 Nails • Sarah at PrncessSarah02 • Charlotte at Charlotte's Nails :) • Shally at Polished & Not Quite Put Together • Rachel-Karina at Polished Criminails • Liz at Nothing But Nail Polish • Fun With My Nail Polish • Operation: Nail It! • Lauriestrodes Fun With Nails • Square Polish • Only Always Soccermom  • Hurr Did, Nails Did • Olivia Writes • The Dragon Lady • Kaki at Glitter Obsession • Isa at IsaBella's World • Gypsy at Gypsy's Glitter • Jackie at MeMa's Mani's  • Lissa at Lissa's Nail Blog  •  Marie at Polish, Polish, Polish...  • ChiChi at... •  Esra at Oje Sihirbazi (Wizard of Polish) •  Nails, Actually • Treselaine at Tres Chic Nails • Carol at Nails by Carol

Friday, June 8, 2012

Argyle Dragon

I love stamping. It's a great way to turn a simple cream polish into something special with the help of a few simple tools. I was in a green mood and used A-England's Dragon to take this cream to the next level.


For my base I used two coats of OPI Stranger Tides then stamped a-england Dragon on top using Konad plate m60.  Dragon is very pretty on its own being a scattered holographic dark green with hints of copper strewn in.  It catches the light and draws attention to the nails.  I've only used Dragon for stamping so far, but I think it deserves to have a full manicure of its own.

Tuesday, June 5, 2012

Drink Up!

This was the water the girls had to filter.  
A few weeks back I was an instructor for a program called G.E.M.S.: Girls in Engineering Math and Science.  It's a program aimed at middle school girls to support math and science exploration.  I led a session on what it's like to be a water treatment engineer and had the girls build their own filter and turn murky water to clear water.    It was a lot of fun...I may have had as much (or more) fun than the girls preparing everything and getting the experiments set up!

In honor of the event, I did my nails with a water marble.  I was a bit pressed for time and only marbled my middle and ring fingers.  Doing just those two nails worked out really well and I like how it turned out.  I usually put of marbling because of how long it takes, but with just doing two nails on each hand the time commitment is significantly cut down.


I used a one-coat base of Sally Hansen Xtreme Wear White On to prepare my nails for the marbling procedure.  For the surrounding nails I used China Glaze Electric Beat.  For the water marble I alternated drops of White On, Electric Beat, and China Glaze Blue Year's Eve.  I was a bit disappointed that the sparkle in Blue Year's Eve didn't show up as much as I would have liked.  Live and learn.

Saturday, June 2, 2012

Week 21: Fruit Manicure

Welcome back to Week 21 of the 52 Week Challenge!  This week the challenge was fruit and it seemed like a good time to create some free-hand nail art.  I picked watermelon as my fruit since we're heading into summer and I think of watermelon and picnics when I think of summer fruit.


For my base I used one coat of Zoya Areej.  I was really pleased that I was able to get almost full coverage with one coat of Areej.  It wasn't perfect, but since I would be painting over it one coat was plenty.  I then used striping tape across the tip of each nail and painted my tips using OPI Stranger Tides.  I didn't use top coat below the tape, but I was mostly successful letting my base polish dry for about an hour before using the tape.  On two nails I didn't get the tape up fast enough and some adhesive remained on the nail.  On the very very tip of my nail I used Zoya Shawn then created lines with Stranger Tides and a tiny dotting tool.  To create the seeds I used Sally Hansen Xtreme Wear Black Out.  I don't like the watermelons I eat to be so seedy, but I think the extra seeds help get the point across than it's watermelons on my nails.

Be sure to check out what others have done for this challenge by visiting their blogs:
LizMarie at I'm Simply Complex • Jenna at I'm Still Thinking... • Caitlin at Addicted 2 Nails • Sarah at PrncessSarah02 • Charlotte at Charlotte's Nails :) • Shally at Polished & Not Quite Put Together • Rachel-Karina at Polished Criminails • Liz at Nothing But Nail Polish • Fun With My Nail Polish • Operation: Nail It! • Lauriestrodes Fun With Nails • Square Polish • Only Always Soccermom  • Hurr Did, Nails Did • Olivia Writes • The Dragon Lady • Kaki at Glitter Obsession • Isa at IsaBella's World • Gypsy at Gypsy's Glitter • Jackie at MeMa's Mani's  • Lissa at Lissa's Nail Blog  •  Marie at Polish, Polish, Polish...  • ChiChi at... •  Esra at Oje Sihirbazi (Wizard of Polish) •  Nails, Actually • Treselaine at Tres Chic Nails • Carol at Nails by Carol

LinkWithin

Related Posts Plugin for WordPress, Blogger...